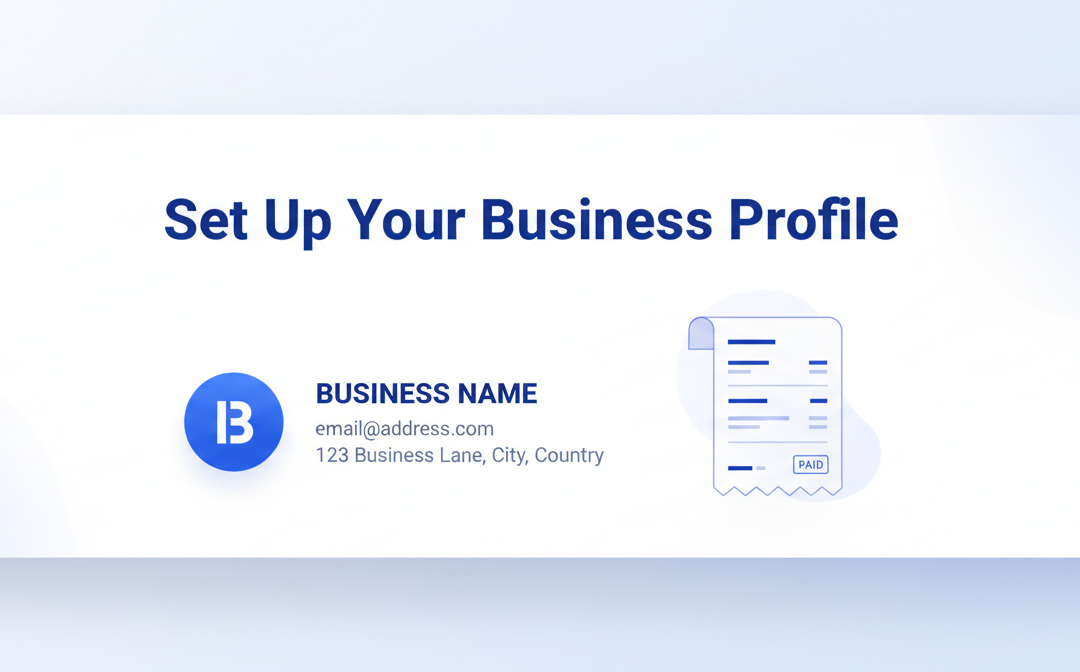
Setting up your business profile on Ledgar is one of the first things you should do after creating your account.
Your business profile helps make your records look professional and complete. When your details are properly set up, your invoices and sales receipts can reflect your business identity more clearly, including your business name, contact details, address, and logo where available. The Settings page in Ledgar includes fields for all of these details under Business Information.
Why your business profile matters
When your business profile is complete, it helps you:
- present a more professional image to clients
- keep your business records consistent
- make invoices and receipts easier for customers to identify
- ensure your business contact details appear correctly on documents
If you plan to send invoices to clients or issue sales receipts, setting this up early is a smart first step. The uploaded Ledgar Settings page supports business name, contact email, address, city, state, country, and business logo setup from one place.
Before you begin
Make sure you are logged into your Ledgar account and have access to the Settings page.
Also note that the Settings page currently shows branding as locked on the Free plan. In that state, the business information fields are disabled, logo upload is disabled, and Ledgar shows a note that invoices and receipts will use a generic business name and a “Powered by Ledgar” footer unless you upgrade.
How to set up your business profile on Ledgar
1. Open the Settings page
Log in to Ledgar and go to Settings.
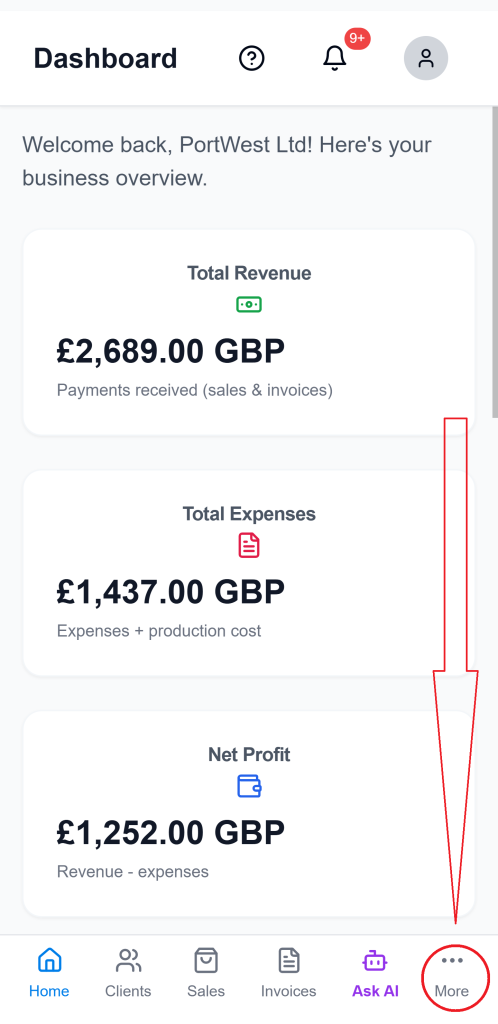
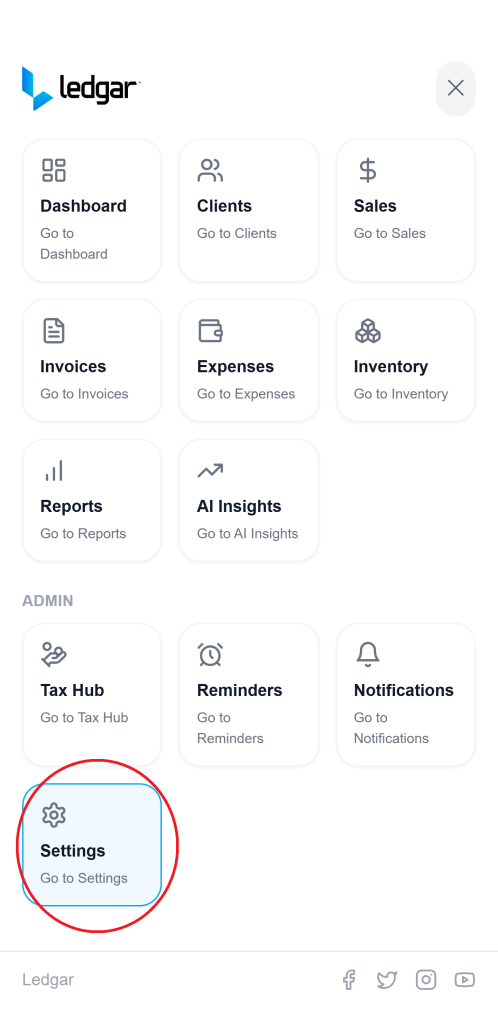
On the Settings page, look for the Business Information section. This is where you can manage your business profile details.
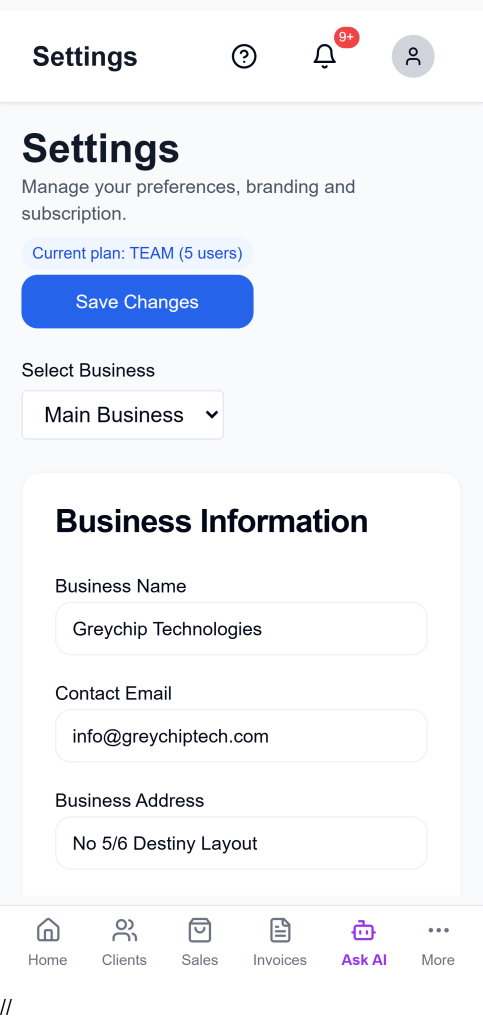
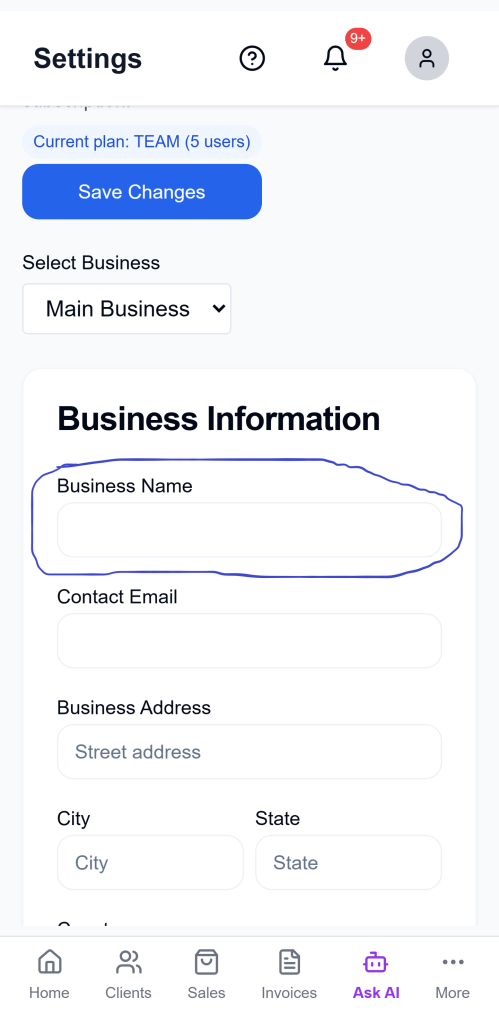
2. Enter your business name
In the Business Name field, type the name of your business exactly as you want it to appear on your business documents.
This is important because your invoices and receipts should reflect the correct business identity. The Settings page includes a dedicated Business Name input under Business Information.
3. Add your business contact email
Find the Contact Email field and enter the email address you want associated with your business.
This helps keep your business profile complete and makes your records more professional. The Settings page includes a Contact Email input in the same Business Information section.
4. Add your business address
Next, fill in your Business Address.
Then complete the location details below it:
- City
- State
- Country
The uploaded Settings page shows separate fields for each of these details, making it easy to enter your full business address properly.
5. Upload your business logo
Under Business Logo, choose an image file from your device and upload it.
If your plan supports branding, Ledgar will upload the logo and display a preview once it is added. The Settings page includes a file input for image uploads and shows the uploaded logo preview when a logo URL is available.
![]()
6. Save your changes
After entering your details, click Save Changes.
The Settings page includes a Save Changes button at the top and also another save button lower on the page, and the app shows a success message when settings are saved successfully.
[Insert screenshot: Save Changes button]
What happens after you save
Once your business profile is set up, your Ledgar account will have your core business details stored in Settings. This is useful for branding and consistency across your workflow, especially when creating invoices and issuing receipts.
Based on the Settings page logic you uploaded, the business profile is designed to hold:
- business name
- contact email
- business address
- city
- state
- country
- logo URL
These details are part of the saved settings for the business.
Important note for Free plan users
If you are on the Free plan, branding customization is currently locked in the Settings page.
That means:
- your business information fields may be disabled
- logo upload may be unavailable
- invoices and receipts may use a generic business name
- Ledgar may show a “Powered by Ledgar” footer
If you want to use your own logo and business details for branding, you may need to upgrade to a supported plan.
Tips for a better business profile
Use your official business name, not a nickname, so your documents stay consistent.
Use an email address you check regularly in case clients need to contact you.
Upload a clear logo with good spacing so it looks clean on invoices and receipts.
Double-check your address details before saving so your records remain accurate.
For screenshots in this tutorial, use descriptive file names and alt text so the page stays more useful for both users and search engines. Google recommends descriptive page titles, unique descriptions, and descriptive image text to help search engines better understand content.
Troubleshooting
I cannot edit my business details
You may be on the Free plan. The uploaded Settings page shows business branding fields as disabled for free-tier users.
I cannot upload my business logo
Logo upload is also locked on the Free plan in the current Settings page logic.
My changes are not appearing
Make sure you clicked Save Changes after updating your information. The page is built to save settings only when the save action is triggered.
Final thoughts
Setting up your business profile on Ledgar is a simple but important step. It helps you prepare your account for cleaner branding, more professional invoices, and more consistent sales records.