Adding expenses on Ledgar helps you keep a clear record of what your business is spending. On mobile, the Expenses screen is built to make this fast: the Add Expense button is prominent at the top of the page and opens a full-screen expense form that is easy to use on a phone.
The expense form includes fields for description, amount, category, date, recurring frequency, notes, currency, and VAT details when VAT is enabled in Tax Hub.
Why add expenses regularly
Recording expenses as they happen helps you:
- keep more accurate business records
- understand where your money is going
- review spending by category
- prepare cleaner reports later
Ledgar’s expense screen also supports filtering, searching, and category breakdowns, so regular expense entry makes those insights much more useful.
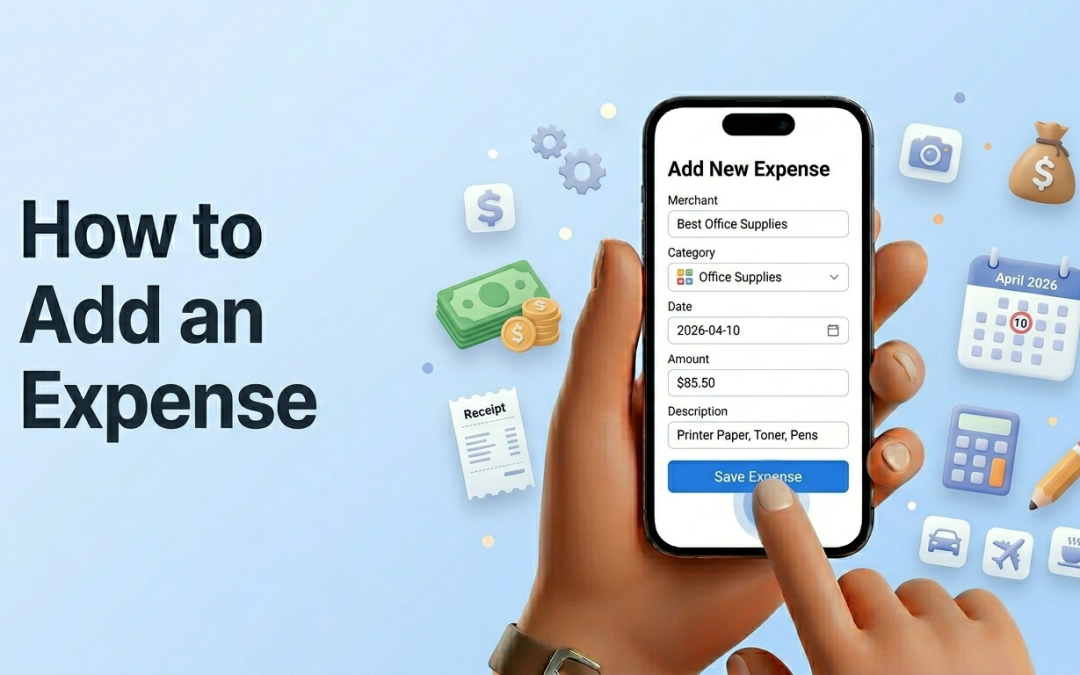
How to add an expense on Ledgar from your phone
1. Open the Expenses page
Open Ledgar and go to Expenses.
At the top of the page, you will see the Add Expense button. On mobile, it is designed to stretch across the available width, making it easier to tap quickly.

2. Tap “Add Expense”
Tap Add Expense to open the expense form.
Ledgar opens the form in a full-screen modal with the title Add Expense.

3. Enter the expense description
In the first field, type a short description of the expense.
The form uses a description input with examples like printer paper, lunch meeting, or fuel, which is a good reminder to keep the description clear and specific. This field is required before the expense can be saved.

4. Enter the amount
Next, type the expense amount.
The amount field is set up for decimal input on mobile, and Ledgar formats the number as you type so it is easier to read. The currency shown with the amount comes from your business settings.
5. Review VAT if it applies
If your business is VAT-registered and VAT is enabled in Tax Hub, the form shows a VAT section with:
- the current VAT rate
- an Amount includes VAT checkbox
Ledgar pulls the VAT rate from your Tax Hub settings, so you do not need to enter it manually every time.
6. Choose a category
Select or enter the expense category.
Category is a required field, and Ledgar uses it later in expense breakdowns and category summaries. If you leave it empty, the form will not save.
7. Set the expense date
Choose the correct date for the expense.
The expense form includes a date field and defaults to today’s date when you first open it.

8. Choose whether it is one-time or recurring
If the expense repeats, choose a recurring option.
Ledgar supports:
- One-time
- Weekly
- Monthly
This is useful for expenses like subscriptions, regular transport, or recurring supplies.

9. Add notes if needed
Use the Notes field for any extra details you want to keep with the expense.
This field is optional, but it can be helpful for reminders, references, or short explanations.
10. Tap “Add Expense”
When everything looks correct, tap Add Expense to save it.
Ledgar validates the form before saving. Description, category, and date must be filled in, the amount must be greater than zero, and your business account must be available. If the save succeeds, the form closes and a success message appears.
What Ledgar saves with the expense
When you add an expense, Ledgar saves:
- description
- amount
- category
- date
- recurring value
- notes
- currency
- VAT fields when VAT is enabled
What you will see after saving
After an expense is added, it appears in your expense list. On mobile, each expense card shows:
- description
- category
- date
- recurring badge when applicable
- notes, if present
- total amount
- VAT amount when VAT exists
This makes it easy to confirm that the expense was saved correctly.
Helpful mobile tips
When entering expenses on your phone, it is best to keep descriptions short and categories consistent. That makes the expense list easier to scan and helps the breakdown screen group your spending more clearly.
If VAT applies, check whether your amount already includes VAT before saving. That small step can help keep your expense records more accurate.
Troubleshooting
I cannot save the expense
Make sure you filled in the description, category, and date, and that the amount is greater than zero. Ledgar checks all of these before saving.
My amount is not formatting the way I expected
Ledgar formats the amount input as you type and again when you leave the field, so the display may become cleaner after you finish entering it.
I do not see the VAT section
The VAT section only appears when your business is VAT-registered and a VAT rate is available from Tax Hub.
I want to mark an expense as recurring
Use the recurring dropdown and choose weekly or monthly instead of leaving it as one-time.
Final thoughts
Ledgar keeps expense entry simple on mobile. In a few taps, you can log a business expense, add VAT details where needed, and keep your records up to date from your phone. The layout is especially useful for business owners who need to record expenses while on the move.