If you want more accurate tax records in Ledgar, one of the first things to do is set up your Tax Hub properly. This helps Ledgar use the right VAT and tax settings when estimating what your business may need to set aside. The Tax Hub lets you turn tax on, choose your country mode, set whether your business is VAT registered, enter your VAT rate, choose how VAT should be counted, add a profit tax estimate, and save everything in one place.
Why this setup matters
When Tax Hub is configured correctly, your tax summary becomes much more useful. Ledgar can then show tax-related figures based on your settings, including a recommended amount to set aside for tax planning. If tax is turned off or VAT is not enabled for your business, those figures are adjusted accordingly.
Step 1: Open Tax Hub in Ledgar
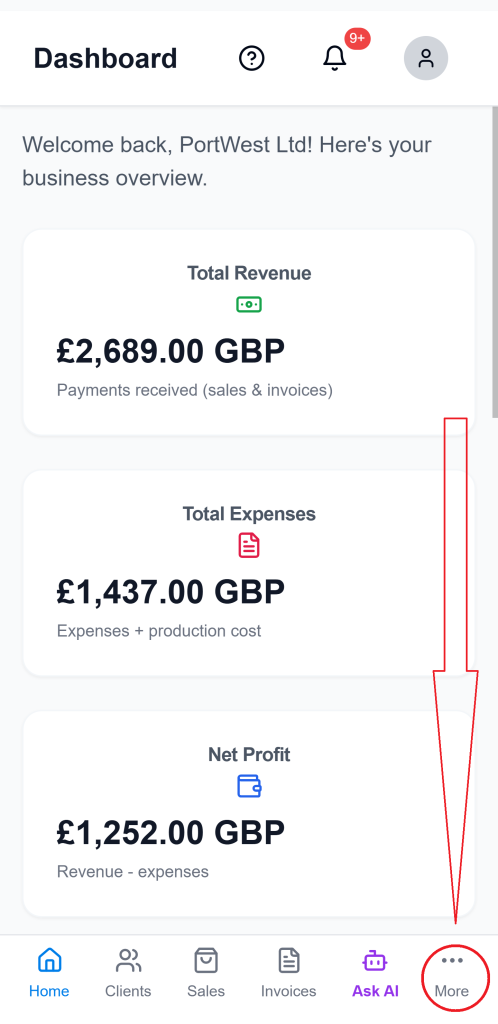
Open Ledgar on your phone. From your dashboard/home page or any other page on the app, tap More on the bottom menu section. This will open the full side-bar menu, then tap Tax Hub. This is where you can manage your tax settings and review your tax summary.

Step 2: Turn on tax
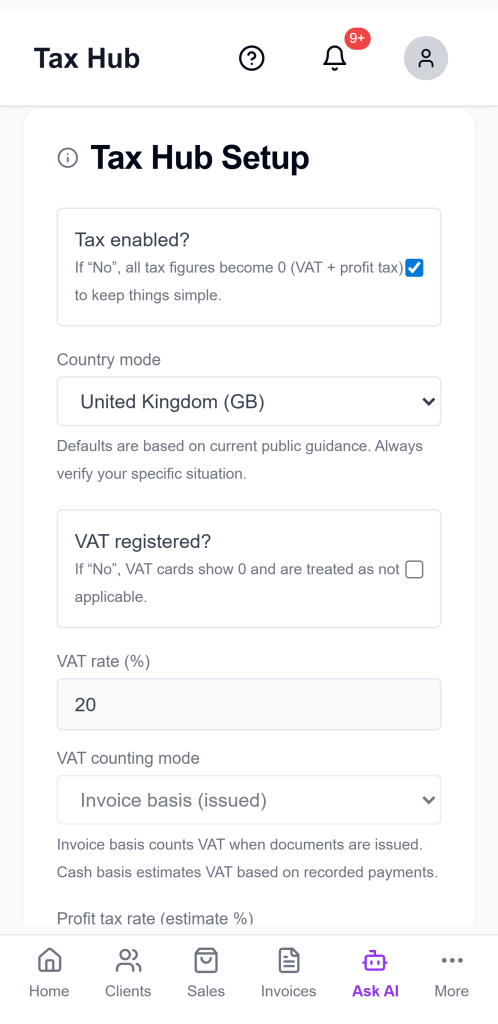
In the setup area, make sure Tax enabled is switched on. This tells Ledgar that you want to track tax inside the app. If tax is turned off, VAT and profit tax estimates are treated as zero.

Step 3: Choose your country mode
Next, choose the country mode that best matches your business. Ledgar includes preset tax modes for Nigeria, United Kingdom, and Other countries. If your business is not in one of the preset countries, you can use Other countries and enter your own values manually.

Step 4: Set your VAT registration status
If your business is VAT registered, switch VAT registered on. If your business is not VAT registered, leave it off. When VAT is turned off for your setup, Ledgar will not calculate VAT-related figures for your summary.

Step 5: Enter your VAT rate
If VAT applies to your business, enter your VAT rate (%). This is the rate Ledgar will use when calculating VAT-related estimates in Tax Hub.

Step 6: Choose your VAT counting mode
Ledgar lets you choose how VAT should be counted:
- Invoice basis means VAT is counted from issued documents or invoices.
- Cash basis means VAT is estimated from actual cash received.
Choose the one that matches how you want Ledgar to estimate VAT for your records.
Step 7: Enter your profit tax estimate
In the Profit tax rate (estimate %) field, enter the rate you want Ledgar to use for profit tax estimation. This is meant to help with planning and set-aside guidance, not to replace professional tax advice.

Step 8: Save your Tax Hub settings
Once your settings are correct, tap Save Tax Hub Settings. Ledgar saves the setup so your Tax Hub figures can reflect the choices you made.
What you will see after setup
After saving your settings, Ledgar can show tax-related summary figures and a recommended set-aside amount. That set-aside combines estimated profit tax and VAT due where applicable, helping you plan ahead instead of being caught off guard later.
You can also review tax information across different timeframes, since Tax Hub supports period filters for your summary view.


Export your tax summary
If you need to keep or share a copy of your tax summary, Ledgar supports CSV and PDF export. On mobile, the app can prepare the file and open the share sheet so you can save or send it directly from your phone.

Ask Tax Assistant for extra help
Tax Hub also includes an Ask Tax Assistant option. This can help users better understand the summary figures shown in the app based on the selected settings and current values.

Tips for a better Tax Hub setup
To get the best results from Tax Hub:
- keep your sales, invoices, and expenses updated
- make sure your VAT setting matches your business status
- review your setup again if your tax situation changes
- use the export option when you want to keep a copy of your tax summary
A clean setup makes the next step much easier: actually tracking your tax inside Ledgar.
Final thoughts
Setting up Tax Hub properly gives you a much better foundation for tracking your business taxes inside Ledgar. Once your tax and VAT settings are in place, you can move on to reviewing your tax summary, checking your estimated set-aside, and monitoring your figures over time.