
Keeping your client list organized is one of the easiest ways to stay on top of your sales and invoicing workflow.
On Ledgar, the Clients page lets you add new clients, update their details, search for them later, view their notes, and open each client’s history.
Why adding clients matters
When your clients are properly saved in Ledgar, it becomes easier to manage your business records and work more efficiently.
A well-organized client list helps you:
- keep customer details in one place
- quickly find a client when creating records
- track each client’s history
- update client information when it changes
- add notes for follow-up and context
The Clients page is built around these tasks, with options to add, edit, delete, search, expand notes, and open individual client history.
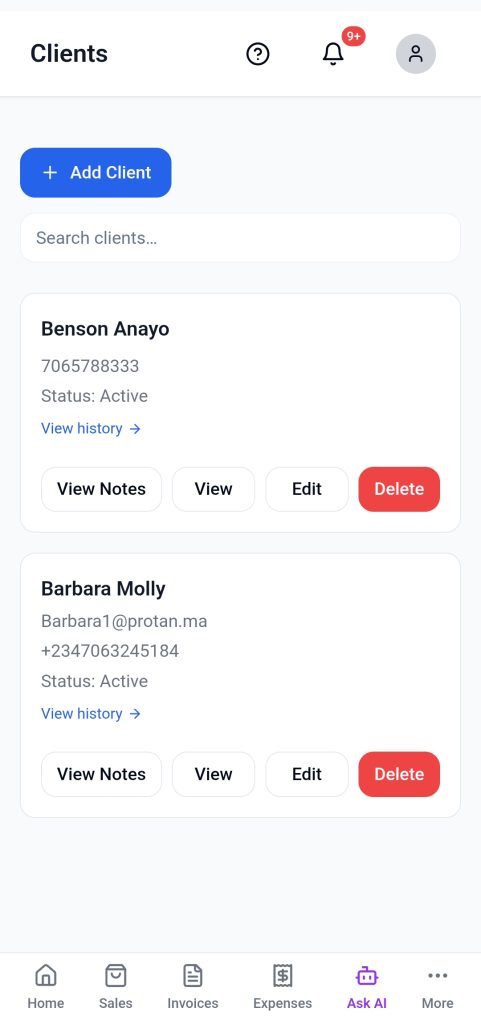
What you can do on the Clients page
Based on the uploaded component, the Clients page allows you to:
- add a new client
- edit an existing client
- delete a client
- search clients by name, email, or phone
- view client notes
- open a client’s history page
These actions are all visible in the main client list interface.
How to add a client on Ledgar
1. Open the Clients page
Go to the Clients section in Ledgar.
At the top of the page, you will see an Add Client button and a search field.
2. Click “Add Client”
Click the Add Client button.
This opens a modal form where you can enter the client’s details. The form is used for both adding and editing clients, and in add mode it opens with blank fields.
3. Enter the client’s first name
In the form, type the client’s First Name.
This field is required. The validation logic in the component checks that first name is not left blank before saving.
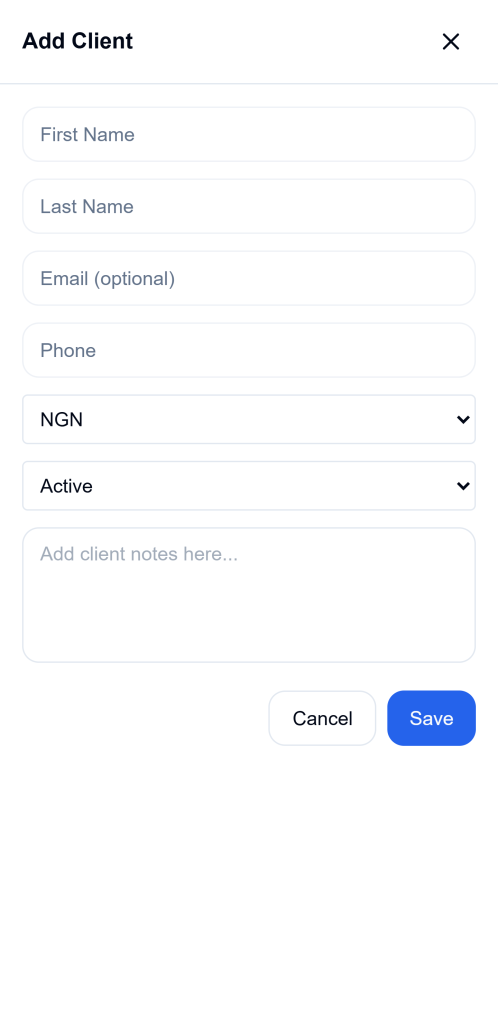
4. Enter the client’s last name
Fill in the Last Name field if needed.
The form includes a separate last name field, but only first name is strictly required by the validation in the component.
5. Add the client’s email address
Enter the client’s Email if you have it.
This field is optional, but if you do enter an email address, it must be in a valid format before the form can be saved.
6. Add the client’s phone number
Enter the client’s Phone number.
This field is required. The form validation checks that phone is not empty before saving the client.
7. Choose the client’s currency
Select the client’s Currency from the dropdown list.
The component uses your settings currency as the default where available, and also provides supported currency options in the form.
8. Set the client’s status
Choose whether the client is:
- Active
- Inactive
The form includes a status dropdown with these two options.
9. Add notes if needed
Use the Notes field to store any extra information about the client.
For example, you might use notes for payment preferences, reminders, special instructions, or relationship history. The form includes a text area specifically for client notes.
10. Save the client
Click Save to add the client.
Once the save is successful, the client is added to the list and the form closes. The component shows success feedback after saving and refreshes the client list.
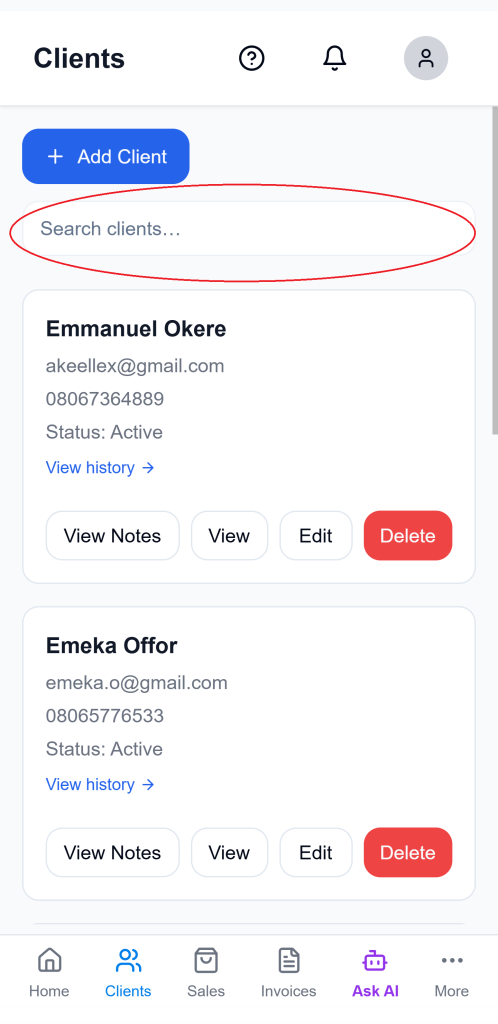
How to search for a client on Ledgar
If you already have many clients saved, use the search box at the top of the page.
The search function checks:
- client name
- email address
- phone number
That means you can find a client by typing part of their name, their email, or their phone number.
How to edit a client on Ledgar
To update a client’s details:
- Find the client in your list
- Click Edit
- Update the details you want to change
- Click Update
The component supports edit mode in the same modal form used for adding clients. When editing, the form loads the existing client details first.
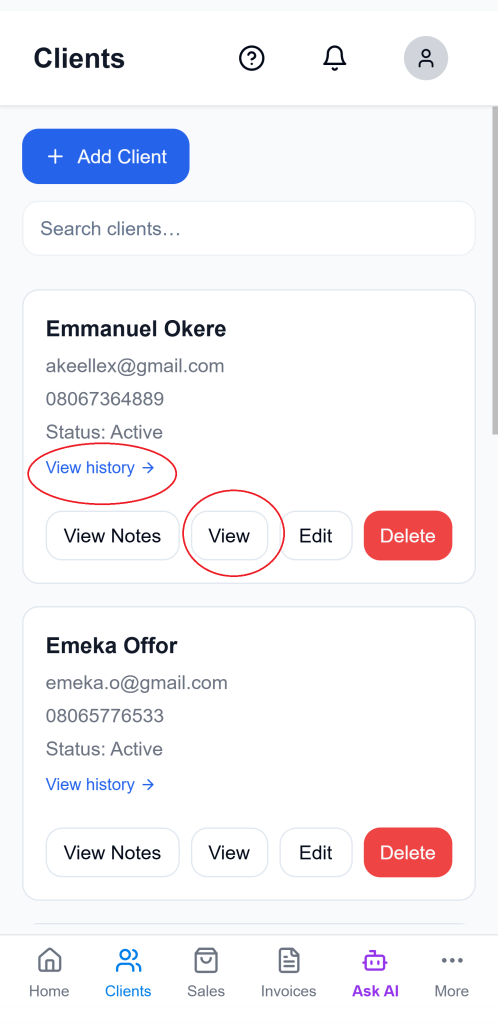
How to view client history
Each client entry includes a way to open the client’s history.
You can:
- click the client card area
- click View
- click the View history link shown on the card
The component routes users to a dedicated client history page using the client ID.
How to view client notes
If a client has notes, you can expand them from the client list.
Click View Notes to open the notes section for that client. If there are no notes yet, Ledgar shows a message saying no notes have been added.
How to delete a client
To remove a client:
- Find the client in the list
- Click Delete
- Confirm the action
The component includes a confirmation prompt before the client is deleted.
Required and optional fields
From the current client form logic:
Required
- First Name
- Phone
- Currency
- Status
Optional
- Last Name
- Notes
If email is entered, it must be valid before the client can be saved.
Tips for managing clients better
Add clients with the names and phone numbers you actually use in day-to-day business, so they are easier to find later.
Use notes to keep small but useful reminders, such as preferred payment style, follow-up details, or client-specific instructions.
Mark inactive clients appropriately so your client list stays cleaner over time.
Use the search box instead of scrolling when your client list grows larger, since the search checks name, email, and phone together.
Troubleshooting
I cannot find a client
Use the search box and try the person’s name, email address, or phone number. The search is designed to check all three.
I cannot see any notes
Click View Notes on the client card. If the client does not have notes yet, Ledgar shows a message that no notes have been added.
Final thoughts
The Clients page on Ledgar is designed to make client management simple. You can add new clients, keep their details updated, store notes, search them quickly, and open their history whenever you need it.