
Creating an invoice on Ledgar is simple, even when you are working from your phone. The Invoices page is set up for mobile use, with a full-width Create Invoice button on smaller screens, so you can quickly start a new invoice without needing a desktop.
If you send invoices to clients regularly, this is one of the most important workflows to get comfortable with. Ledgar’s invoice form lets you choose a client, add one or more items, set the issue date and due date, add optional notes, and calculate VAT and totals before saving.
Before you begin
Before creating an invoice, make sure you already have at least one client saved in Ledgar. The Invoices page disables the Create Invoice button when there are no clients available and shows a note telling you to add a client first.
It is also a good idea to set up your business profile first, since your invoices can use your business name, contact email, address, city, state, country, and logo when invoice PDFs are generated.
How to create an invoice on Ledgar from your phone
1. Open the Invoices page
Open Ledgar on your phone and go to Invoices.
At the top of the page, you will see the Create Invoice button. On mobile, this button is designed to span the full width of the screen, making it easier to tap.
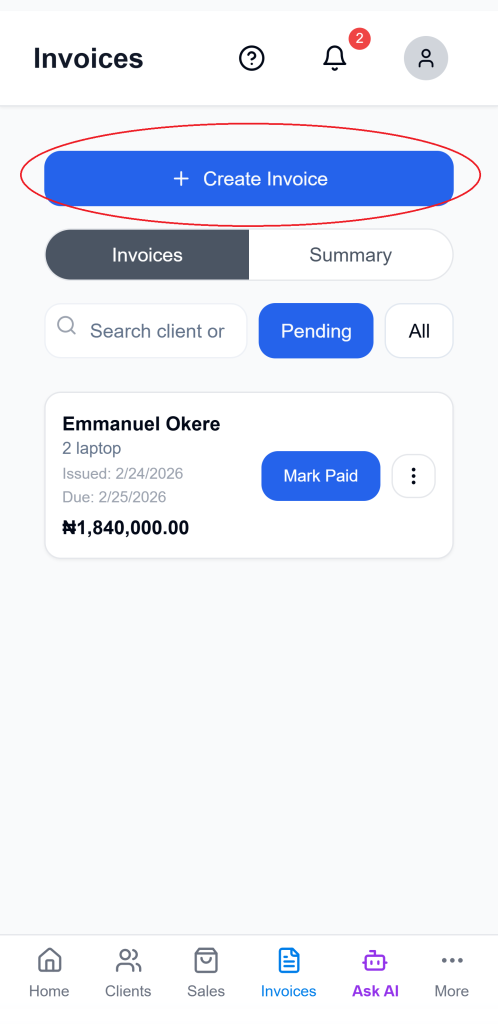
2. Tap “Create Invoice”
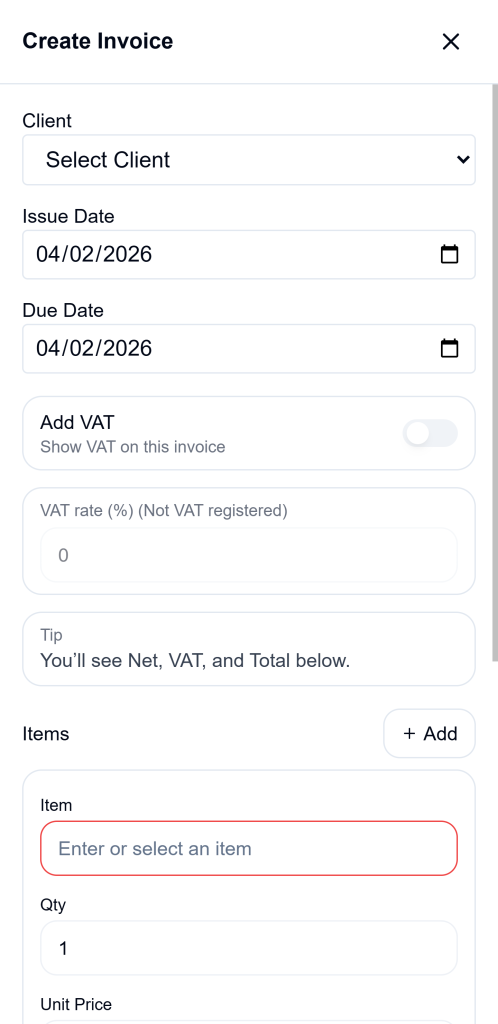
Tap Create Invoice to open the invoice form.
The form starts with default values including your business currency, today’s date as the issue date, today’s date as the due date, and VAT settings pulled from your Tax Hub profile when VAT is enabled.
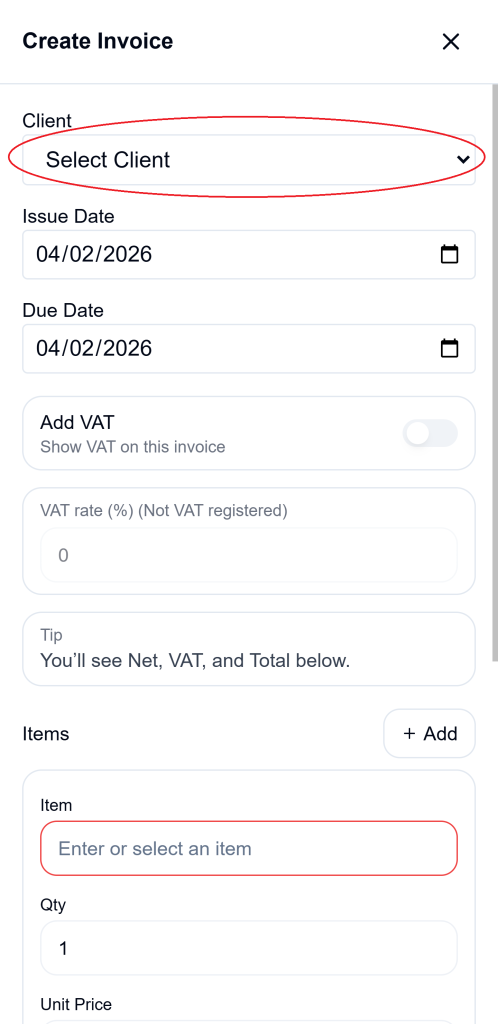
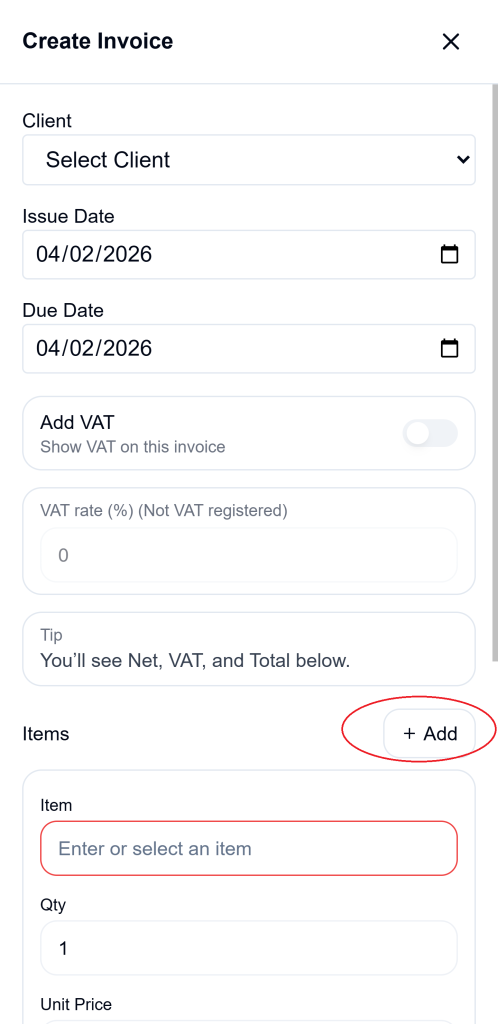
3. Select the client
Choose the client you want to invoice.
A client is required before the invoice can be saved. If no client is selected, Ledgar shows an error asking you to select one.
4. Set the issue date and due date
Choose the Issue Date and Due Date for the invoice.
The invoice form includes separate fields for both dates, so you can clearly define when the invoice was created and when payment is expected.
5. Add the first invoice item
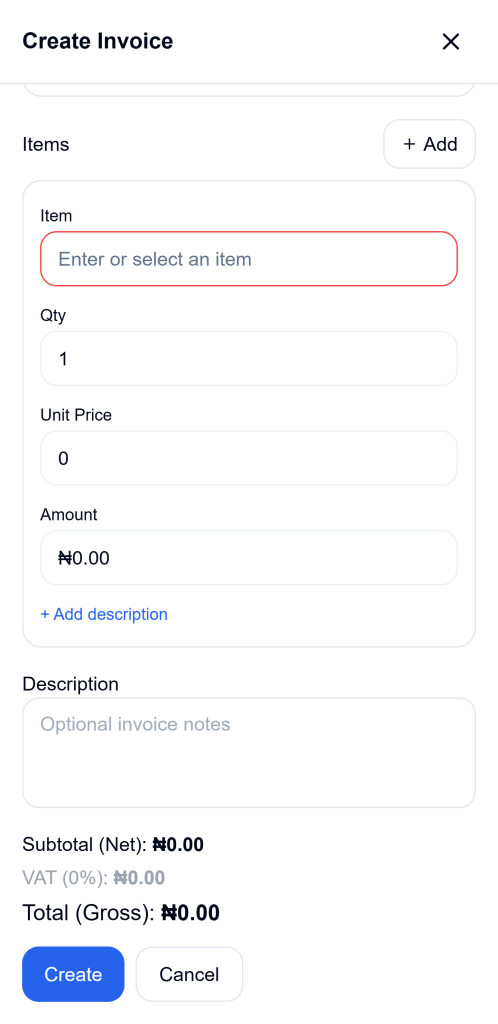
In the Items section, enter the item or service you are billing for.
For each line item, Ledgar stores:
- the item
- quantity
- unit price
- amount
- optional line description
The amount is calculated from quantity multiplied by unit price.
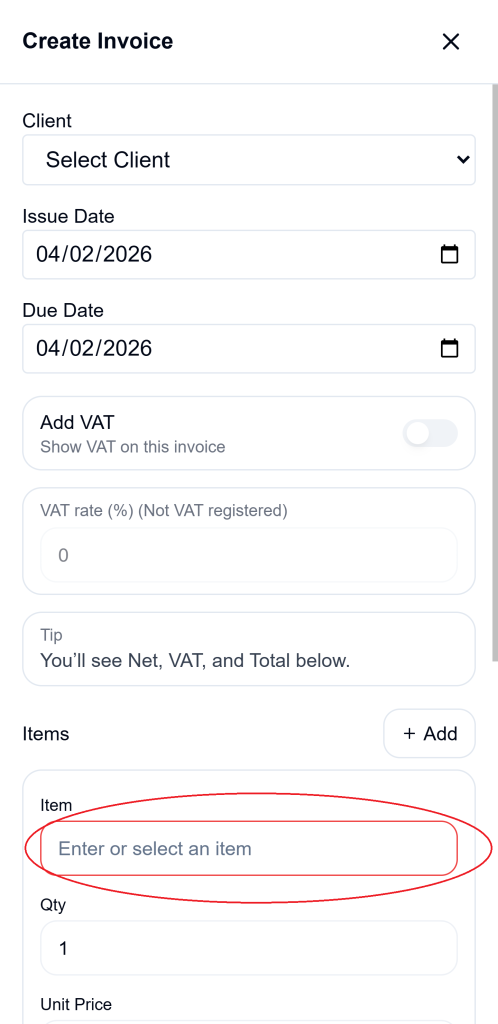
6. Use saved item suggestions when available
As you type an item name, Ledgar can show matching saved items.
When you choose one of the suggestions, Ledgar fills in the item name, unit price, and amount for that row automatically based on the selected item and quantity.
7. Add more items if needed
If the invoice contains more than one item, add another row and continue filling in the details.
Ledgar supports multiple invoice rows, and if you have added more than one row, you can also remove a row when needed.
8. Add optional line descriptions
If you want to give more detail for a particular item, you can expand the row description and enter extra information for that line.
This is useful when you want a client to see a little more context for a product or service without making the item name too long.
9. Add an invoice note
Below the item rows, Ledgar includes a Description field for optional invoice notes. This can be used for short explanations, reminders, or extra billing details.
10. Review VAT settings
If your business is VAT-registered, Ledgar can include VAT on the invoice. The invoice form supports:
- whether VAT is included
- the tax rate to apply
Ledgar then calculates the VAT amount and adds it to the net subtotal to produce the gross total.
11. Review the totals
Before saving, check the totals shown at the bottom of the form.
Ledgar displays:
- Subtotal (Net)
- VAT
- Total (Gross)
This makes it easier to confirm the final invoice amount before you create it.
12. Tap “Create”
When everything looks correct, tap Create.
Ledgar saves the invoice with the selected client, item rows, description, issue date, due date, VAT values, currency, and total amounts. New invoices are created with Unpaid status and a starting paid amount of zero.
What happens after you create the invoice
Once the invoice is saved, it appears in your invoice list. Ledgar also refreshes invoice data and related summaries after a successful save.
On the Invoices page, you can later search invoices by client name, invoice description, or even item names, which is especially helpful when you are working on mobile and want to find something quickly without scrolling through the full list.
What information Ledgar saves in the invoice
When you create an invoice, Ledgar saves:
- client ID
- invoice description
- net amount
- VAT amount
- gross total
- tax settings
- issue date
- due date
- currency
- payment status
- total paid
- invoice items with quantity, unit price, amount, and optional custom description
Helpful mobile tips
When creating invoices on your phone, it helps to fill the form in this order: client first, dates next, then item rows, then VAT, then final review. That keeps the process faster and reduces mistakes.
If you already know you will invoice the same kinds of items often, saved items make invoice creation quicker because Ledgar can suggest them as you type.
If you do not find the item you need, Ledgar can create a new item while saving the invoice, using the name and unit price you entered.
Troubleshooting
I cannot tap Create Invoice
You may not have any clients added yet. The Invoices page requires at least one client before invoice creation becomes available.
I get an error asking me to select a client
A client must be selected before the invoice can be saved.
My invoice will not save
Make sure the invoice has at least one item and that the total amount is greater than zero. Ledgar checks both before saving.
I typed an item that does not exist
That is okay. Ledgar can create the new item during the invoice save process if the row has a valid item name and price.
I want to find an invoice quickly later
Use the search bar on the Invoices page. It can match client name, invoice description, and item names.
Final thoughts
Creating invoices on Ledgar is designed to be straightforward on mobile. Once your clients are in place, you can build an invoice from your phone, review the totals, and save it in a few taps. The workflow is especially helpful for business owners who need to invoice customers while away from a desk.